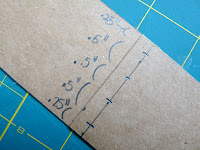
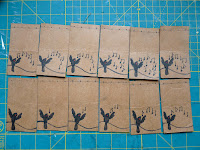
1: Cut the amount of paper or soda box you plan to use into 3.5"x 2" rectangles:
2: Then put 4 spots where you will pass the needle and poke each dot so it would be easy to pass the needle when stitching the book together:
3: Draw your illustrations. Then put them together, the beginning in the bottom and end on top:
4:Here comes the stitching. the amount of string you need is 5 times the length of the book and then you double it. After you have the string and needle ready pass the needle through the 3rd hole leaving 2 inches behind:
5: Circle the needle around the spine, then stitch again through the 3rd hole:
6: From the back of the book stitch through the 2nd hole:
7: Then do it again, and then go through the first hole:
8: Bring the thread around the spine and go through the 1st hole again. Same thing again only this time you bring the thread around the head of the book:
9: Now from the back of the book stitch through the 2nd hole:
10: Then stitch through the 3rd hole:
11: Now from the back of the book stitch through the 4th hole. Then do it again going over the spine:
12: One more time! only this time go over the front side of the book. Tie your strings together and voila! you got yourself a flip book:
Here is a video of the final result. I have discovered two things:
1) I need a tripod!
2) Soda box is toooo thick, mmmm I need to find what can I recycled as paper? something not too thin nor too thick, if you have suggestions let me know.
Anyway this won't be the last flip book, I still want to experiment. Have a good weekend everyone!!!
Here is the video Link:
1st Flip Book from Romina Perez on Vimeo.
PS:Sorry for the bad quality, wait till I get that Tripod :)
PS:Sorry for the bad quality, wait till I get that Tripod :)


Perhaps, paper grocery bags, like the trader joe's ones? They aren't quite as hard as soda boxes, but still kind of stiff. :)
ReplyDeleteoh that's a good sugestion :)
ReplyDeletethis was really helpful!!! thanksss :D
ReplyDelete